Mostrando entradas con la etiqueta loom/telar. Mostrar todas las entradas

sábado, 11 de mayo de 2013

DIY: gorro con telar circular// hat with circular loom

¡Tenia que haber subido esta entrada hace mucho! pero entre que parecía que el tiempo iba a mejor, que empeoraba... y asi unas cuantas veces, no me decidía. Bueno, finalmente aqui la teneis, si todavía hace frio donde vivís podeis probar a hacerlo, y si ya empieza a hacer calor ¡Pues también y ya lo pondreis el invierno que viene! ;)

This should have already been uploaded! But because spring was comming... but then the weather went cold again... I didn't know what to do! Anyway, if it's still cold where you live you can make this and wear it but if it's already hot... make it too and you'll wear it later!

...


¡Buenas! pues aquí estamos con el primer proyecto con los telares circulares, un gorro.

Hi! Here we are with the first project with the circular loom:


Vamos a necesitar un telar de unos 28cm de diámetro (si yo me equivoqué y cogí el de 23 creyendo que me iba a servir, pero el tejido encoge mucho y acabé deshaciendolo y volviendolo a hacer entero -.-") 100g de lana, la aguja de tejer y la de lana.

We are going to need a 28cm diameter loom, 100g of wool and the two needles.


Comenzamos haciendo un nudo corredizo en el primer poste y ahora vamos dando una vuelta, del interior del telar hacia fuera, alrededor de todos los postes.

Start by making a knot at the first peg and now go around each of them, form the inside to the outside.


Cuando lleguemos al poste inicial pasamos el hilo por fuera del poste y sacamos por encima el punto de debajo. Continuamos haciendo esto entre 20 o 30 vueltas, dependiendo de como os guste.

When you arrive to the first peg pass the wool to the outside, take the stitch that is now at the bottom and pass it above you have made. Now you have to do about 20 or 30 rounds of this stitch, depending on how you like it.


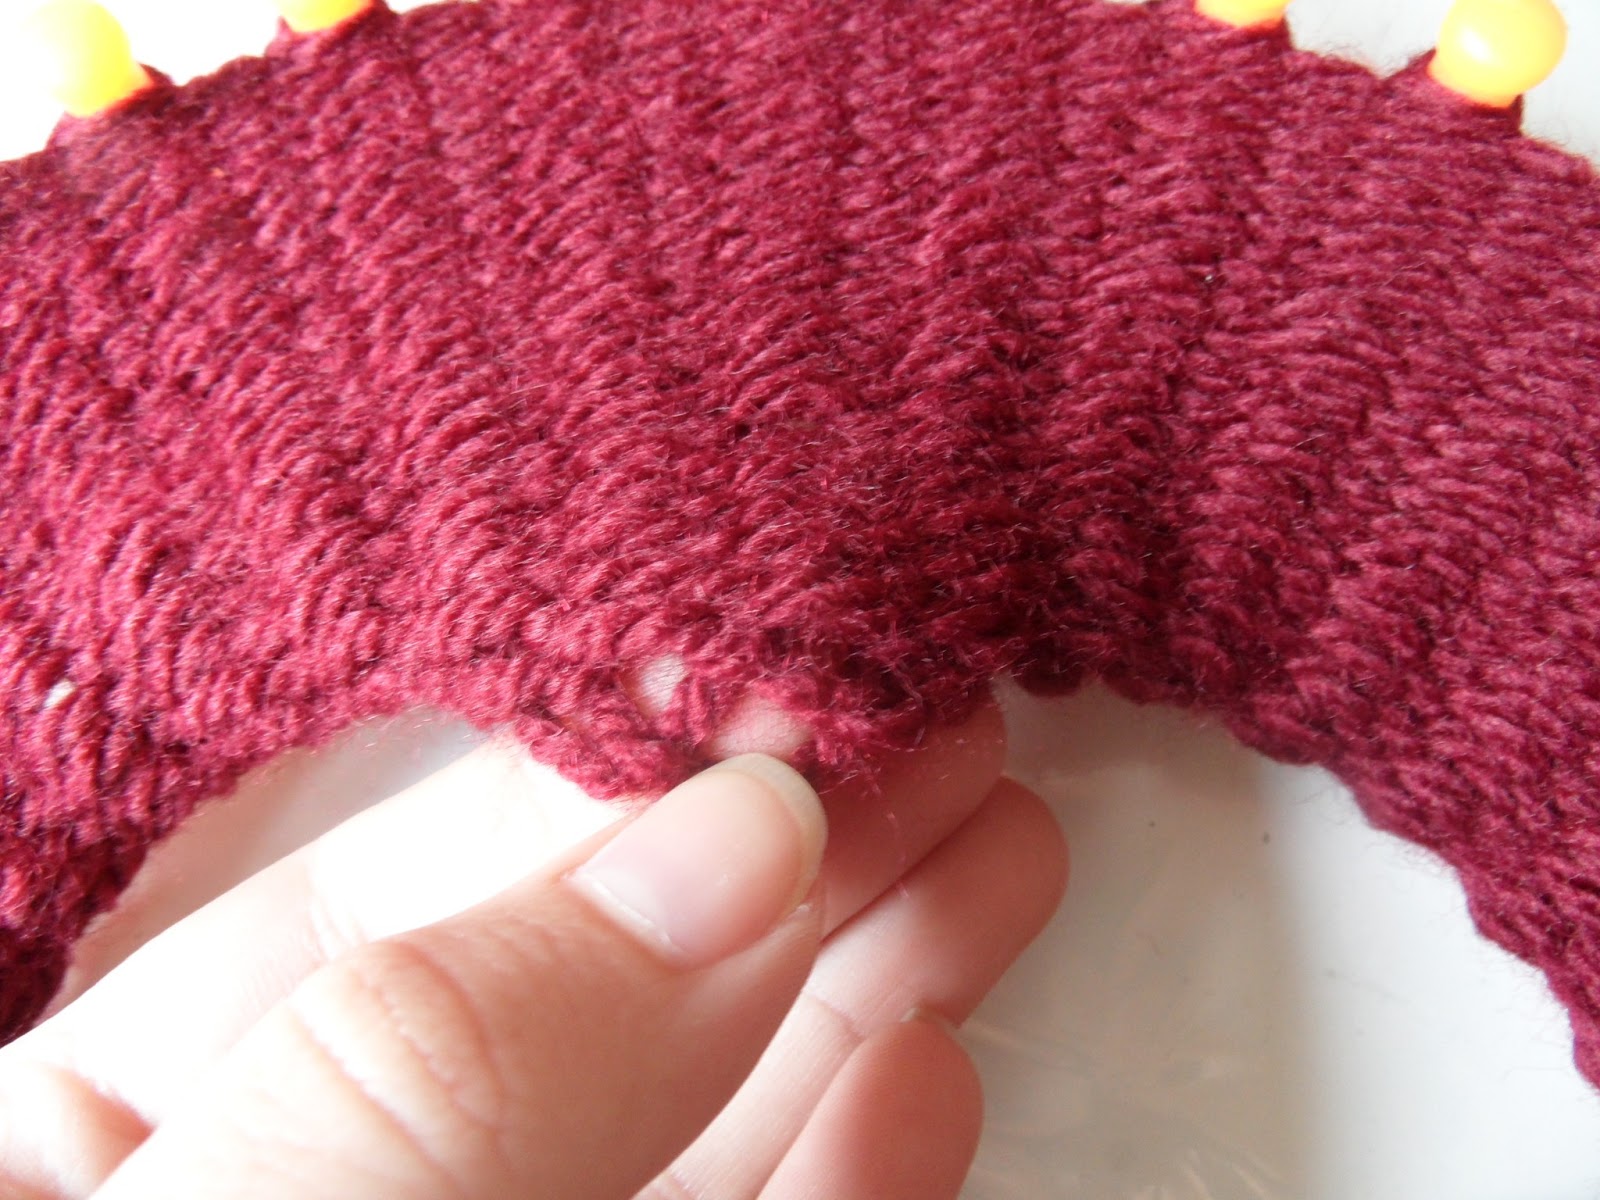
Una vez las tenemos, hay que coger del comienzo los primeros puntos que hicimos, subirlos a su poste correspondiente y pasar el punto de debajo por encima, para unir ambos tejidos.

Once you finish with that you have to take the first stitches and put them up the the pegs again and pass the bottom stitch above this one.


Ahora vamos a cambiar de punto, pero para que quede espeso tenemos que hacerlo con doble hilo, ¿cómo? buscad dentro de la madeja una bolita más pequeña en la que, si la deshaceis, encontrareis el cabo opuesto de la madeja. Ahora teneis que unirlo con el otro haciendo un nudo en el ultimo punto.

Now we're going to change the stitch, but this one has to be made with two threads, so it looks thick. For this you have to look for the other end of the thread into the skein and join it tiwh the other making a knot near the last stitch.


El nuevo punto es el mismo que hicimos en la primerisima vuelta al telar, hay que rodear los postes de dentro a fuera y luego sacar los puntos de debajo.

This stitch is the same that we did in the first round, you have to go arond the pegs, from the inside to the outside, and then pass the bottom stitches.


Bueno, y este es el momento en el que a Ceci se le ocurre probarse el gorro y se da cuenta de que no le sirve ¿Qué opción queda? deshacerlo y volver a empezar -.-"

And here's the moment when I realise that the hat is too small for me andhave to undo it and start again with a bigger loom -.-"


Una vez que acabemos toda la lana, vamos a cerrar el gorro, ¡Ya no queda nada!

When you reach the end of the thread, it's time to close it!


Vamos a coger el último punto que hicimos y con una aguja de ganchillo pasamos lo que sobra de hilo por el formando como otro punto.

Take the last stitch you've made and pass the thread making a loop.


Dejamos eso de lado y ahora vamos a ir sacando todos los puntos y poniéndolos en una aguja. Procura que sea grande, a mi al principio no me cabían todos y tuve que pasarlos todos a otra.

Leave this appart and now take all the stitches and put them into a needle, take a big one!


Cuando hayamos metido todos los puntos ponemos al final el punto que habíamos preparado antes y vamos pasando todos los puntos por dentro de este.

When you have all the stitches out take the one you made before, put it into the needle too and pass all the stitches inside this one.


Cuando ya hayamos pasado todos los puntos cogemos la hebra de lana final, la pasamos por dentro del punto y apretamos bien (como es el mismo hilo el punto se cerrará)

When you finish doing this take the end of the thread, pass it over the loop and pull.


Para acabar podemos hacer un par de nudos con la hebra restante y la aguja de lana y después cortamos lo que sobra ¡Y ya lo tenemos!

Now just make a few knots to secure it and then cut the thread that is left. And here you have it!


martes, 2 de abril de 2013

nuevos telares!

 ¡Por fin he encontrado los telares!
Solo quería el grande para hacer un gorro, pero ya que tengo de otros tamaños habrá que probarlos y tejer más cosinas ;)

I've finally bought the looms!
I just wanted the bigger one to make a knitted hat, but now I have more I'll try to knit different things ;)


Los tamaños que venían en el kit son:

The sizes are:

                                                28cm                                                  23cm

                                               18cm                                                  13,5cm


Y las herramientas: Un gancho de tricotar y una aguja de lana.

And the tools: a sewing needle and a knitting hook.


¿Qué os parece? son tan coloridos que me dan ganas de hacer un stop-motion con ellos :D
La verdad es que ya los estrené y en un solo día ya hice un gorro ¡Estoy acumulando bastantes entradas! Me cuesta contenerme pero trataré de no subirla hasta dentro de unos cuantos días, de todas formas si quereis verlo tengo una foto en instagram.

What do you think? they're so colourful I want to do a stop-motion with them :D
I've already done a hat, but I can't post it yet! anyway if you want to see it I have a photo in instagram.


lunes, 25 de febrero de 2013

DIY: Telar circular // Circular loom

¡Buenas! hace un tiempo os enseñé como hacer un telar rectangular, y ahora es el turno del circular. Este se utiliza para hacer gorros, bufandas circulares...

Hi! a while ago I showed you how to make your own rectangular loom, and now here it comes the circular one. It's used to make hats, circular scarves...


Los materiales son los mismos: tabla, sierra de marquetería, lija, clavos, martillo...

The materials are the same: plywood board, scroll saw, handpaper, hammer, nails...


Comenzamos marcando el rectángulo más grande que podamos hacer en la tabla, normalmente estos telares suelen tener un diámetro de 30 cm, y también marcamos su centro.

Start by doing the biggest square you can, usually this looms have 30 cm of diameter. Also mark the centre.


Ahora con un compás hacemos la circunferencia más grande que podamos (tomando como centro el que marcamos) y luego otra un par de centímetros menor.

Now with a compass draw the biggest circle you can, having as centre the one marked, and then othes a few centimetres smaller.


Ahora tenemos que marcar 38 puntos, donde podremos los clavos.

Now mark 38 points, where the nails will be.


Corta la pieza y ahora viene lo complicado: hay que poner 2 clavos en cada punto, asi que, en total... si, 76. Tened paciencia y aseguraos de dejar un espacio entre ellos, porque sino la aguja de ganchillo no podrá coger el punto y ¡no podréis hacer nada!

Cut the piece and get ready because you hace to put 2 nails on each point, yes a total of 76! Be patient and make sure you are leaving a gap between the two nails, so the crochet hook can take the stiches.


Os lo enseño asi, tal cual lo tengo ahora ya que, si os digo la verdad, tejer con el es un poco enrevesado y me ha acabado desesperando. El telar rectangular hecho una misma funciona de maravilla pero, la verdad, para el circular casi es mejor hacer un esfuerzo y buscar donde comprar uno. Tampoco os estoy diciendo que no funcione (como podeis ver algo hice XD) pero el hecho de tener dos clavos dificulta bastante la cosa...

This is my loom just how it's now. To be fair, knitting with it is quite difficult, so if you want to get one I'd reccomend you make an effort and buy one. Not with the rectangular, it works perfectly, but the two nails here makes the thing a little bit more complicated.

jueves, 8 de noviembre de 2012

Bufanda terminada


¡Por fin os enseño el resultado!


Decidí unir los dos extremos para que quedara como un tubo (no se si en la foto se ve bien la unión)


La verdad es que no me esperaba que quedara tan bien, estoy bastante contenta con el resultado ^.^
ya la he probado, ahora que empieza a hacer frío y y es super calentita.


Y por hoy no hay más XD, solamente quería enseñárosla, que no me parecía plan tardar una semana más (aunque poco me ha faltado...)


domingo, 4 de noviembre de 2012

DIY: Telar rectangular: cómo cerrar tejidos

Como os comentaba, en esta entrada os enseño a terminar las labores en el telar rectangular, ya que va a ser lo mismo para todos los tipos de puntos que hagamos.


Comenzamos sacando con la aguja de ganchillo el punto que esta en el extremo contrario de donde terminamos de tejer. Sacamos también el segundo punto y pasamos el primero por dentro del segundo. Sacamos el tercero y pasamos el segundo por dentro del tercero... así hasta llegar al ultimo punto.


Para terminar simplemente pasamos el cabo de la lana que queda por dentro del último punto y apretamos bien.

¡Y eso es todo!

LinkWithin

Related Posts Plugin for WordPress, Blogger...